
From Books to Baby
3October 15, 2012 by Decorum DIYer
When Chris and I purchased our home five years ago, we were only a family of three (five, if you count our two kitties). Having a four bedroom home seemed like too much space, even considering we didn’t have a finished basement. Even though one of our bedrooms was utilized as a laundry room, we were able to appoint the smallest bedroom as a home office. This is what our third bedroom looked like when we purchased the home:

The room is only 9′ x 10′, but does have a sizable closet. All it took to turn this room into an office was some elbow grease, two gallons of paint, window treatments, a spray painted ceiling fan, and our own mismatch of furniture. We were even able to squeeze in space for a lounging area with television and a makeshift play center in the closet for our then 18 month-old son. Of course, I neglected to take a photo of the room as the ‘office’, but do have a few everyday shots taken by my son. These should give you an idea of what the office looked like then:

Uh! Ignore the dork in the photo. I had just returned from teaching dance and was unknowingly pregnant with our daughter. You can clearly see the stripes painted on the wall in this photo. I guess that was my version of ‘writing on the wall’?

The makeshift play area in the closet.

This is a photo probably taken by our son playing with the ‘photo booth’ feature. No matter, here you can see our striped walls, gray slip-covered side chairs and vertical striped drapes.

A better lit photo of the same vantage from the computer. Note the sleepy-headed silly boy. Oh, they grow too fast.
As I mentioned, I had no idea I would be expecting a second child in less than a year. I happily painted the now office with a sense of ‘whatever’, as it was just an office. Had I known a little girl, or any child for that matter, was on her way, I would have been way more specific about my choices. I knew one day it would probably be a child’s bedroom, but that was in the distant future – so I thought.
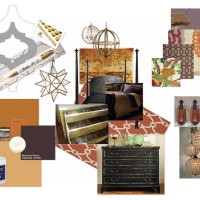
I chose the two shades of tan-ish brown, ‘Gobi Desert’ (lighter shade) and ‘Harvest Brown’ (darker shade) from the drapes. They aren’t exact matches to the colors in the drapes, but I used my drapes as a guide and then tweaked the colors a bit to coordinate with the orange-y trim. At the time, I wasn’t sure what to do with the trim and my husband was anti-‘trim painting’. No biggie, I knew the room would look ten times better with just a little color, albeit neutral color, on the walls.

Behr’s ‘Gobi Desert’

Behr’s ‘Harvest Brown’
I painted the entire room, ceiling and closet interior included, with the ‘Gobi Desert’ (lighter shade). I thought that stripes would look nice, give the room some visual interest, add width to a small room, and be playful against the vertical striped drapes. I thought it best to have five stripes total in terms of scale. I didn’t do any form of higher mathematical thinking to arrive at five stripes, it just seemed appropriate to me, so that is what I did. This meant that I only needed to paint two stripes on the wall – easy. I used a ruler and a level to arrive at the height of my stripes (being mindful of things like window casings and light switches). After penciling in my level lines to create stripes, I carefully adhered 3M’s blue painter’s tape just outside of the pencil line, so that the pencil line would be covered with the paint. I was sure to press the tape firmly into the wall to create a tight seal. I also painted a primer coat of the base color, Behr’s ‘Gobi Desert’ over the areas where the tape met the wall to minimize bleeding of the darker paint under the tape. Once the primer coat of the base color was dry, I painted my stripes between the lines of blue tape in Behr’s ‘Harvest Brown’. I immediately removed the tape, and voila! I really loved the look and enjoyed being in my office.
Fast forward a month later when I realized I was growing an itty bitty baby inside.

Our (second) little one…
Normally, I am all about painting and decorating, and the like, but for some reason, the first thing I said was, “I am NOT repainting that room!”. I don’t know why, I guess I really liked the stripes. So, a baby’s room design was planned around the neutral color scheme and striped walls. We reused the dark-toned nursery furniture that we used for our first-born. I had a bit of a New England seaside vibe going in the office, so I decided to play on the northeastern nautical theme in my daughter’s nursery and add touches of coral for femininity. Here is how my little girl’s room looked for about a two years…, until we found out we were having another little one.

The third bedroom transformed from a home office to a little girl’s nursery.

The crib corner.

Claire’s bedding was from Overstock.com and cost $40. The pattern is a mix of ivory and black floral/vine print and ivory/black gingham. It was a very neutral, but sweet looking set. Perfect for a little girl. (crib bumper shown)

Crib’s sheet in ivory/black gingham.

The changing table on the adjacent wall to the crib. I was careful to hang the photos at a height that was out of reach. Also, the changing table is placed farther from the crib to avoid climbing. (Note: The changing table is a different stain color than the rest of the furniture, as it was sent to me in the incorrect color. After reviewing the return shipping costs and timeframes, I decided to keep the piece in the incorrect color. I always thought about painting it, but could never decide. Also, the baskets were once all the same color, but have weathered to different shades over time. Another sore point for me.)

The room’s entrance. I think this gives you an idea of just how tiny the room is, but also it is a great view of the striped walls. You can also see how many different tones of wood are in the room. I do have plans to paint the wood trim and door. One day….

The view of the room from the entrance along the wall adjacent to the door.

The dresser wall (as seen from the side in the last photo). Again, you can really see the wall’s stripes here.

The sea horses are somewhat tied into the loose nautical/beach theme. In actuality, the sea horses were placed in the room, as my first thought when I saw the first sonogram of Claire was, “She looks just like a tiny sea horse.” I have always had an affinity for sea horses, but Claire’s existence has made that bond even stronger.

Our reading corner for snuggling and reading bedtime stories.

The closet was outfitted with wire shelving from Closetmaid, however it was purchased from Craigslist, so I configured the closet the best I could with the odds and ends I purchased. Reminder: This is a real closet, not a styled closet. I use my closets for hanging clothing and storage. There is no waste of space for the sake of looks.

The original ceiling fan that was installed in the 1980’s. To modernize it, we spray-painted the shiny brass bits with a black, hammered finish and painted the blades a dark brown (Behr’s ‘Bitter Chocolate’ to simulate a dark-stained wood. The globe was also replaced.

Artwork above the long privacy window: Four shell shadow boxes were purchased from a discount store for a $1 each.

Seashell prints using shades of coral, gray, ivory, and black were printed from an online image search and placed into an inexpensive frame ($2) from the dollar store.

The artwork over the changing table was made simply and cheaply. Again, it is a varying assortment of seashell prints in colors that tie into the room.

Supplies for artwork above changing table.
The artwork above the changing table required the following supplies:
- Images of seashells printed from this website: Vintage Printable, a great resource for all images.
- Three inexpensive frames with glass from the dollar store (so, $3 @ $1 each).
- Two Glidden paint color samples. I received these for free during a promotional sample give-a-way. I chose light gray and coral colors.
- Scrapbook or photo adhesive corners to adhere the prints to the frames backboard.

I painted the coral color directly on the frames back boards to create faux photo mats. I painted the wooden frames with the light gray paint. I didn’t try to get perfect coverage, as I wanted the wooden frame to appear almost like grayed-out driftwood. The image was trimmed and adhered to the painted backboard using the clear, adhesive photo corners. The frames were hung with nails and secured further with 3M velcro adhesive strips.

The finished artwork hung above the changing table. Total cost: $7, as I received the paint for free and already owned the paper. The only things I purchased were the frames ($1 each), photo corners ($1), and 3M adhesive velcro strips ($3).

Claire’s formal name “Clairisse Madelynn” above her crib. This is a vinyl custom decal that was $12 from an online vendor.
Books to Baby Nursery Budget Breakdown:
- Nursery furniture – already owned, $0
- Drapes – already owned, $0 (They were originally $10 per panel, so $40 – Nautica brand)
- Blackout cellular shade – $120 (This was a necessary expense, as the shades in the room when it was an office were only light-filtering. Thanks to my odd-shaped 71 7/8″w x 26″h windows, any shade is a custom order. Thankfully, I was able to purchase the blackout, cellular shade 75% off with free shipping during JCPenney’s ‘Black Friday’ sale just weeks before Claire was born.)
- Shag ivory rug (8×10) – Home Depot, $40 (By the way, the rug was too long so about 2 inches is tucked behind the dresser wall to make it fit)
- Crib bedding – Overstock, $40
- Artwork – $13
- Name decal – $12
- Sea horse statues – $45 (but free to me, as I used gift cards from my baby shower)
- Closetmaid wire shelving – $30 (only a portion of what I purchased was used in the nursery closet)
- Paint – already painted, $0
Total Cost: $300 (remember $120 of that budget was due to the blackout, cellular shade*)
* Quick note: For my odd-sized bedroom windows, I usually opt to purchase two shades and mount them side-by-side, as it is cheaper. There is only a slight gap that is usually not noticeable. However, in the application for my daughter’s nursery, even the slight gap allowed too much light into the room during the day (especially in the morning), as her window faces east. It is usually cheaper to purchase two, standard-sized, off-the-shelf shades, than to order one, large, custom shade. Keep this in mind, if you are on the hunt for odd-sized window shades.
Obviously, already having the nursery furniture, walls painted, and draperies made this office to nursery transformation easy and budget-friendly. Had I started from scrat.ch, I could probably accomplish the same for $500 or less. The downside is that it would have probably taken more than a weekend to pull together and require a lot more diy frugal craftiness – but it is doable.
I hope you have enjoyed this little trip back in time to visit my daughter’s nursery. I have a plan in the works to show you how I transformed this same nursery with coral accents into my son’s nursery with red accents, keeping much of the room the same. Until next time…, happy painting!


[…] may remember that in Claire’s nursery, I used a purchased vinyl decal above her crib. Although the manufacturer’s instructions […]
your little boy is so so so so so so so so cute x
[…] a recap, here is Clairisse’s nursery post as well as a photo to remind you of what Clairisse’s room looked like just two years […]